Ableton Live Creating track with sample loops TUTORiAL
FANTASTiC | 18 February 2024 | 134 MB
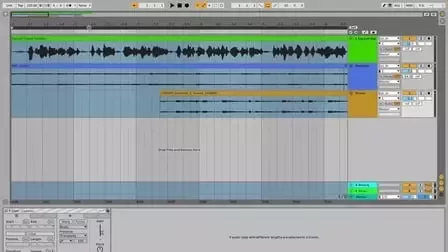
In this class we will look at the basics of understanding the Arrangement view of Ableton Live Lite 11.
In lesson 1 we will look into how to go into the preferences menu so that we can set up the input and output of the audio, set up your midi controller to work with Ableton, and understanding the folders where your samples will be accessed by Ableton and turning on and off the warp feature.
Lesson 2 we will look at how to access your plugins, how to use the browser feature to find and organize your samples, previewing samples, and loading a sample on to the project screen.
Lesson 3, we will practice adding an audio track, renaming it and dragging a sample on to it, understanding the looping brace and how to loop the sample while you write your lyrics, and locating the overdub and metronome feature icons.
Lesson 4 we will look at how to access and load and layer in a melody track, how to quickly duplicate the sample, sync the samples with the tempo, replacing samples and how to adjust the view of the project screen.
Lesson 5 we will go into how to use midi files to create multiple samples with different instruments and creating vocals with A.I. technology as well as adding them into your project!
Lesson 1
•Preferences
•Audio In and Out Setup
•Sample rate
•Count In
•Setting up midi controller settings
•File folder
•Warp
•Look and feel of Ableton
Lesson 2
•Plug – Ins – Preferences
•Browser to search and organize samples
•Creating collections and adding samples to the collections.
•Preview samples
•Search for specific type of samples like Piano.
•Going through the categories like Instruments, drum kits.
•Dragging a sample on to the arrangement view screen.
Lesson 3
•The two different views, session and arrangement view
•Switching views by using Tab
•How to activate and deactivate the views
•Adding an audio and midi track
•Renaming the audio and midi tracks
•Create a drums track
•Search, preview a drum loop and find a drum loop
•Arming a track
•Drag a drum loop on to the project
•Changing the gain of a sample (louder or softer)
•Warp feature
•Fading feature
•Loop Brace – to have a sample loop
•Exporting a track to create a wav, Flac, and mp3 file
•Turning loop on and off
•Overdub icon
•Metronome icon
Lesson 4 – layering 2 tracks a melody and drum track
•Adding a second track (audio) melody
•Finding a melody loop
•Dragging the sample on to the audio track
•Duplicating the audio sample
•Syncing the samples by the BPM and warp feature
•Replacing the melody and drum samples
•Changing the view of the arrangement window – zooming in and out.
Lesson 5
•Using midi files.
•Using MPC Software to load a midi file, choose an instrument, create a wav file and drag it into Ableton.
•Where to find Mpc Expansions.
•Creating another sample with the same midi file with a different instrument.
•Adding vocals with A.I. technology
•Text to speech vocal creation with FakeYou using voices like Nas
•Quickly finding downloaded samples.